
Easy Step-By-Step
I started breeding crickets back in 2017 for my gecko (Peanut) and another gecko I was caring for. Not having to go to the pet shop every couple weeks for crickets was a big plus. It took about a year to tweak the procedure, but now I’m guaranteed a couple hundred crickets each breeding session.
Items Required:
Live crickets – the number depends on how many you want. One hundred will get you 50-100 babies.
Small plastic or styrofoam container
Large container/tank with vented lid
Soil without Vermiculite (those small white balls found in some bagged soil)
Aluminum Screening – *** It must be aluminum, not black fibre glass, as they will chew through it! ***
Spray Bottle
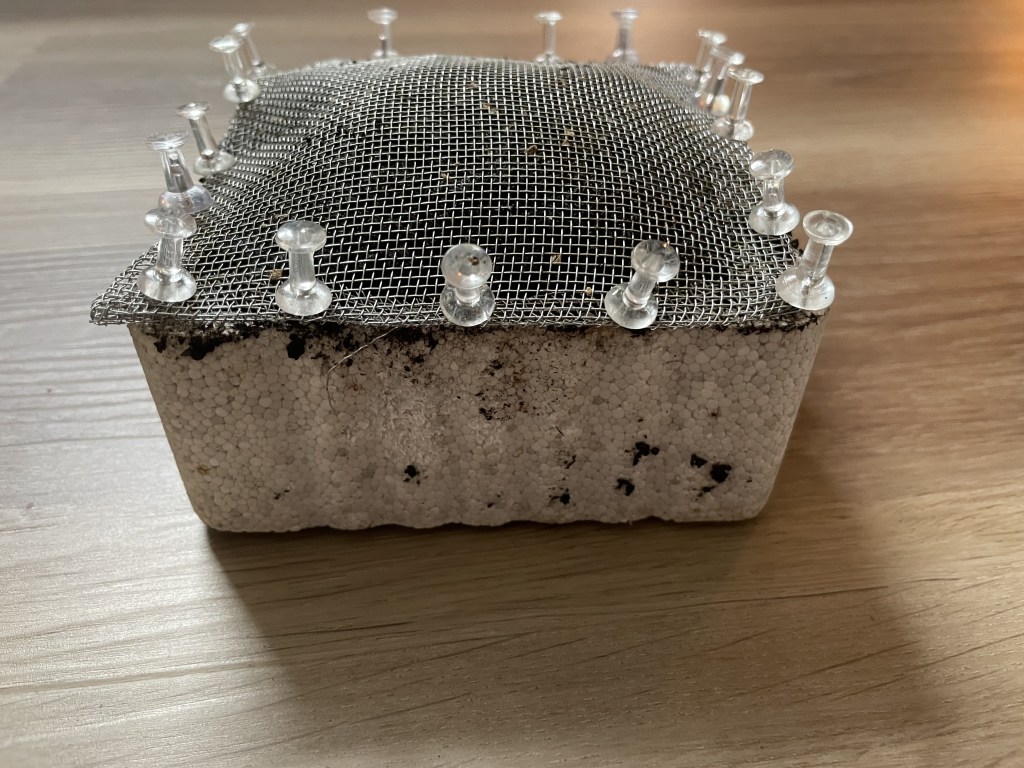
Moisten the soil (all of it, not just the top) and place it in the container almost up to the lip. Pack it down moderately. This styrofoam container (egg for scale) is from a pet store and contained live worms. Plastic sandwich containers work well too. The size is dependent on the size of your large container/tank and how many crickets you want. For a couple geckos, the 10 gallon aquarium works great for my roughly 300 crickets.

Then add a high mound of slightly moistened (yes, I hate that word too) soil evenly on top. Try to get it up as high as possible in the corners.

Gently place the screen on top. You’ll likely have to add more soil to the corners, as you press the screen down. Ensure the surface is smooth and the entire screen is making contact with the soil. I used push pins with the styrofoam containers. For plastic, you can wrap pipe cleaners around the sides to hold the screen down.

Beware of “bad seeds” like this. Crickets that are members of gangs spend their time capping other crickets.
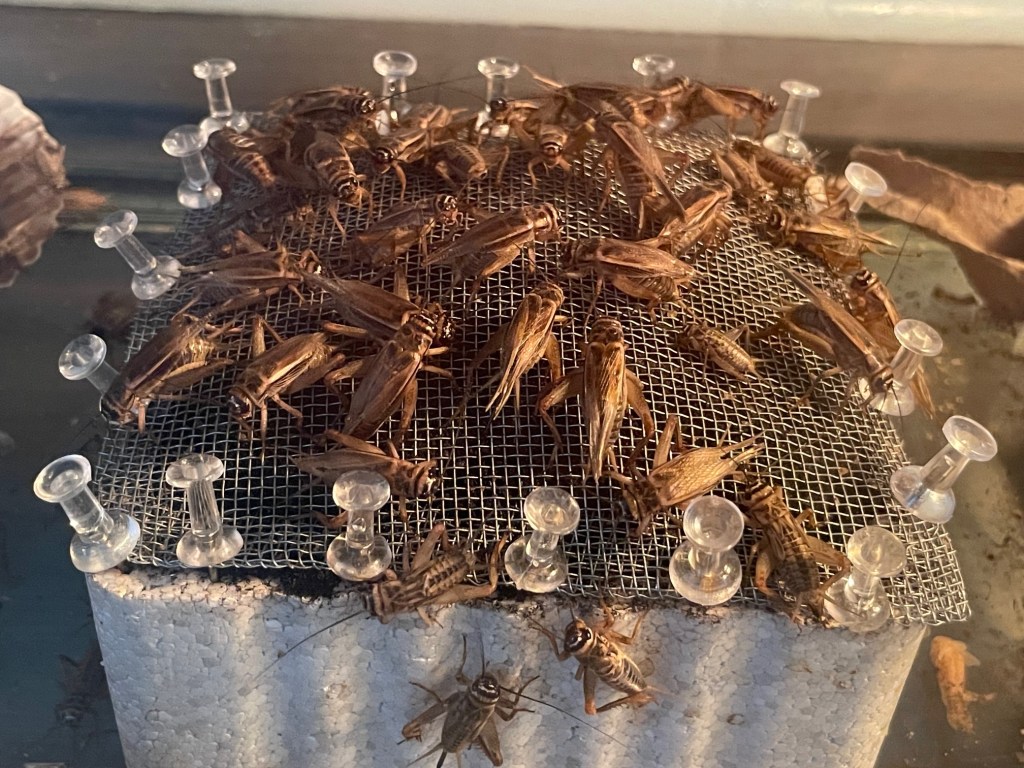
Place the container into your tank with the adult crickets.

I recommend playing a little Barry White – Let’s Get It On to get the crickets in the mood!
I write down the date on a sticky note and place it on the tank. Keep the breeding medium there for about two weeks.

Spray the soil once or twice a day, depending on how dry the air is. You want to keep the soil moist so that the eggs don’t dry out.
Keep your crickets warm with a light (82-86°F). Give them lots of food. They regulate their food intake and won’t overeat. I feed them calcium fortified commercial cricket food as well as cat food and veggies such as carrots, broccoli and cauliflower. For water, I use cricket gel water and spray it generously when I spray the breeding medium, to keep it extra MOIST.
Enjoy the males doing their little dance to lure the ladies!
After roughly two weeks, remove the breeding container and place it into another large container/tank. Carefully remove the screen. Gently tap it over the soil as you remove it in case there are any eggs stuck to the screen.
I usually add a layer of soil, just enough to cover, in order to protect the eggs very close to the surface.

This is what the eggs look like.
Keep this tank around the same temperature as breeding tank. For the next two weeks, keep the soil sprayed (gently so as to not disturb the soil) and watch for the eggs to hatch.
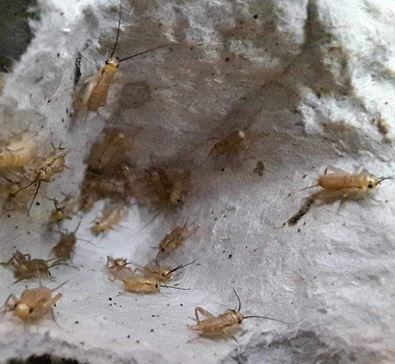
Welcome your new, adorable little babies into the world!
Treat your babies just like the adults. Place plenty of egg cartons in the tank, food and gel water. The babies will drown in very little water so use either gel water or moistened cotton balls or balled-up tissue/paper towels.
| Elizatip: If you’re ever in need of large quantities of egg cartons, contact your local baker or cake maker! |
Female crickets have an egg depositor on their backside.

Male cricket.

Enjoying the joyous journey of cricket breeding! Your animals will be extremely appreciative of their home-grown noms!
